Participating in Zoom beta programs
Zoom's new Beta Testing Platform, Centercode, allows testers to generate device/testing profiles to help Zoom identify who is a good fit for the Beta Programs. It also allows testers inside of these Beta Programs to submit and combine feedback, track bug reports, and suggest features in one central location.
This article covers:
Prerequisites for enrolling and participating in beta programs
- Have a Zoom license (Pro users or above)
- Be willing to actively provide feedback and engage in our community
Note: While you can still sign up for a beta account if you are on a free account, you will not be selected for a beta.
How to create a beta profile
Before participating in a beta, you will need to create a beta profile for Centercode. To create a profile:
- Navigate to Zoom's beta page.
- Click Put me on the list.
- Once on the Zoom Centercode sign up page, scroll to the bottom of the page and click Get Started.
- Enter your email address in the Email Address field.
- Click Verify Email Address.
- Once you receive the confirmation email, click Verify Your Email Address.
- Complete your registration by filling out the rest of your profile information, including your password.
- Click Submit.
- After reading the welcome message, click Continue.
- On the next page, enter your Basic Profile information.
Note: All sections are mandatory, except the Additional Opportunities section. These options can also be changed after completing the initial account setup. - On the next page, read the terms and conditions.
- Enter your login Email Address and Password.
- Click I Agree.
- Click Continue.
How to log in to Centercode for the first time
- In your browser, navigate to https://zoom.centercode.com
- Click Login with Zoom.
- Log in to Zoom using your normal login process and credentials.
- Click Authorize.
How to customize your beta profile
Add an avatar
My Avatar is where you can upload a picture to be set as the profile picture for your account, to further personalize your experience. To add an Avatar:
- On the homepage of your account, click Choose an Avatar.
- Click Attach File.
- From your device, select the image file you wish to upload.
- Once the file has uploaded, adjust the crop area on the image.
- Click Save.
Update account settings
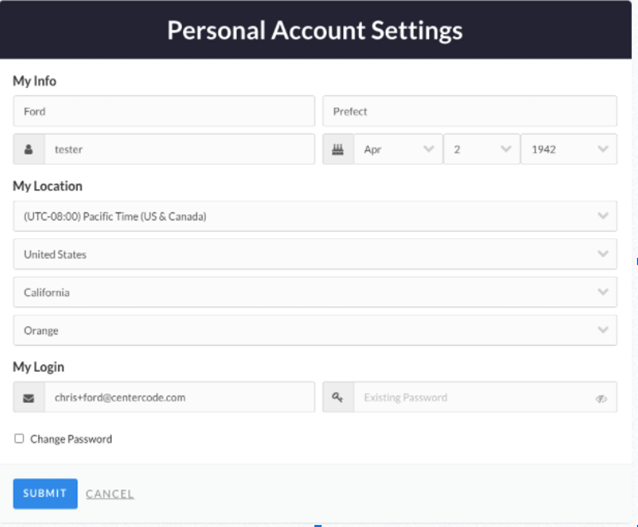
Personal Account Settings helps collect simple user information, but also provides an area to update login details including the login email and password.

Update profile information
Under My Profile, you can edit the information about yourself, set when you initially created your profile. These items allow Zoom to make demographic and geographical decisions, as well as gather information needed to deliver test devices and more.
How to manage hardware platforms for testing
Under Test Platforms, you can manage your current hardware platforms as well as add new devices to your platform. Adding hardware platforms allows our Beta Program Managers to select users on Centercode who best fit the profile for the features to be tested.
Add a platform
When adding a platform, required and optional entries may be shown. Please be as complete as possible, but it's also ok if you can't remember how long you've owned the device or what kind of LED panel it has.
Note: This area is dynamically generated, so expect that the available selections and the questions asked about these selections will change over time as well.
To add a platform to your profile:
- Under Test Platforms, click Add a Platform.
- Choose the hardware type you would like to add.

- Fill out the questionnaire for the device/hardware.

- Click Submit.
- (Optional) Click Add a Platform, to add another hardware profile.
Manage a platform
After adding a platform, you can edit the information about the device or remove the platform from your account.
It is recommended to click Manage Platforms every so often to ensure your Platform Profiles are as information-rich as possible to better your chances of being selected for alpha and beta projects.
Edit a platform
- Click on the name of the platform.
- Make any changes to the information for the platform.
- Click Submit.
Remove a platform
- Move your mouse over the platform’s name.
- Click the X icon to the right of the platform name.
- When prompted Delete this item, click Yes.
How to use beta resources
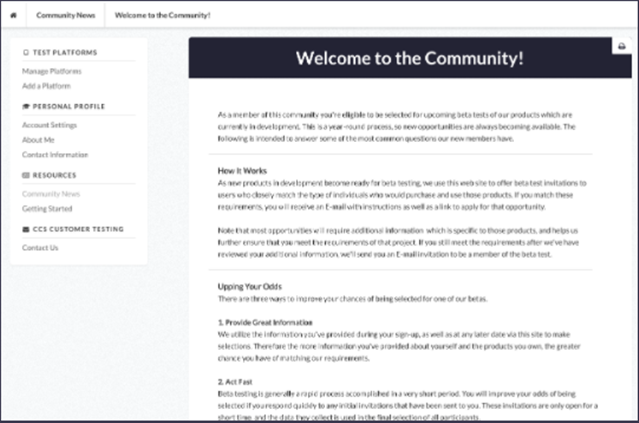
In the Resources section, users will find Community News and Getting Started. These areas will be populated by Beta Program Managers with bulletins for Testers as well as helpful hints. Check these resources when starting out, but also check back over time for new updates.
How to view the beta programs you're enrolled in
Once you have been selected for a beta, in addition to a welcome email, you will also have a new section on the homepage called My Projects, where you can see the betas you are currently enrolled in.
How to join beta testing
Once you have been added to a beta in Centercode, you will receive an email notification that you have been added. To complete the registration for a beta:
- Open the email sent to your registered email address.
Note: This email will be from noreply@centercode.com
- Click Log in or Create an Account.
Note: If you have not created an account, you will be prompted to create an account. - Once you have created an account or logged in to your account, you will have access to the beta from your homepage.
- Under My Projects, select the beta you have been assigned.

Once you have access to the beta you can download the latest builds in the Overview or Resources sections, as well as view any known issues in the Resources section.
How to submit feedback
From the Feedback section, you can submit Issues, Ideas, Praise, or Discussions for the beta. To leave feedback for issues with a beta:
- Under My Projects, select the beta you are testing.
- Under the Feedback section, to the right of Issues, click Submit.
- On the issue submission page:
- If the issue you are logging has already been filed, hover over the issue and click This Matches.
On the next page, you will be taken to a thread, where you can read other users' comments regarding the issue, as well as add a comment yourself. - If you do not see a match:
- Scroll to the bottom of the page and click Create New Feedback.
On the next page, you will be presented with a questionnaire regarding the issue. - Once you have completed the questionnaire for the issue, click Submit.


